Mini-pat: reduce, re-use and recycle - working with plastics
In this Mini-PAT you will design and make a useful new product from old plastic bottles. But first you will look at how plastic is used in everyday life.
You will only do individual work in this Mini-PAT.

Reduce, re-use, recycle
In Grade 8 Term 4, you learnt that the environment is damaged when more and more things are made and thrown away. You learnt that waste is formed in order to make new products, and that the products themselves become waste when they are thrown away. You can reduce the negative impact of this practice on the environment in different ways.
Firstly, you can buy fewer things, which is called reducing your consumption.
Secondly, you can use some things over and over, so that you don't have to buy new things. This is called re-using things. You can also re-use something for a different purpose than it was originally made for. For example, many people use old hot-water tanks (geysers) to make "braai-skottels" in which they can make fire and barbeque food outside.

But what if something you own gets broken or you don't have any use for it anymore? Then you have to throw it away. Fortunately, there is a clever way of throwing things away, by separating the different types of waste.
For example, if you and your family collect all your plastic waste separately, then someone can take that plastic to a recycling factory where new plastic is made from the old plastic. At a recycling factory, the old plastic is washed and shredded into very small pieces.
It is then melted and "moulded" in the shape of "pellets". The pellets can then be used as the raw material to make new plastic products.
You learnt in the previous chapter how plastic pellets are moulded into new shapes.
Week 1
Plastics are easy to form into complicated shapes, do not corrode, have high electrical resistance, are tough and can be made in many colours.
Plastics in the classroom and at home (60 minutes)
1. Look around you on your desk, at your clothes and in your school bag. Make a list of all the things you can see that are made of plastic. Also write down whether it is made of hard or soft plastic and thick or thin plastic.
|
Plastic item |
Hard or soft |
Thick, thin, or woven |
2. The table below lists different things that you can see in a house. Write "yes" or "no" next to each item to show whether it is made of plastic or not.
|
floor tiles |
|
|
roof plates |
|
|
cushions |
|
|
windows |
|
|
window frames |
|
|
paint |
|
|
chair backs |
|
|
lights |
|
|
bottles for washing soap |
|
|
sponges |
|
|
the outside of a TV or radio |
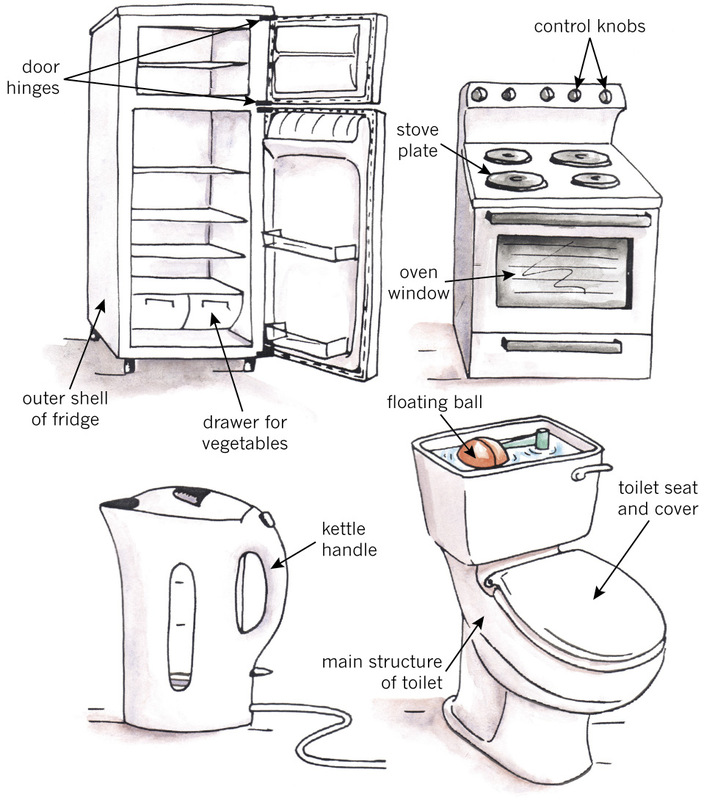
3. Look at the illustrations of household appliances below. The arrows point to different parts of the appliances, and labels are given to describe the different parts of the appliances. Write a "P" below each label for a part that is made from plastic.
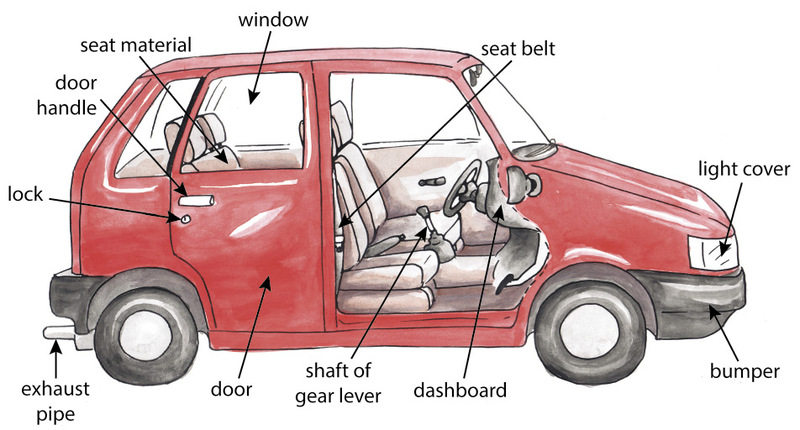
4. A long time ago, cars were heavy because most of their parts were made of steel, cast iron and even wood. Nowadays, cars are much lighter, and therefore they use less petrol to travel each kilometre. One way that was used to make cars lighter is to use more plastic when building them, instead of using metal.
Look at the illustrations of the inside and outside of a car below. The arrows point to different parts, and labels are given to describe these different parts. Write a "P" below each label for a part that is made from plastic.
5. How can you test whether a material is plastic or metal? Hints: Think about hardness, strength, magnetism, sound, heat and fire.
Safety warning:
Burning plastic can start a fire and release poisonous gases. Molten plastic can cause serious burn wounds.
Different scenarios for reusing plastic bottles (30 minutes)
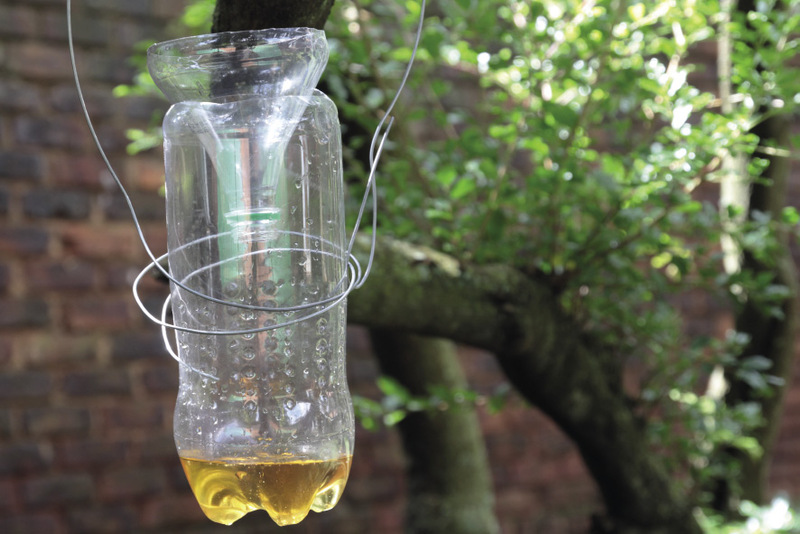
On the following pages, you are shown photos of four scenarios in which new products were made from old plastic bottles.
Each of the products solves a certain problem. In other words, it satisfies or addresses a certain need. Answer the questions for each scenario about the problem or need. Then choose one of these scenarios for the product that you will design and make.
Scenario A
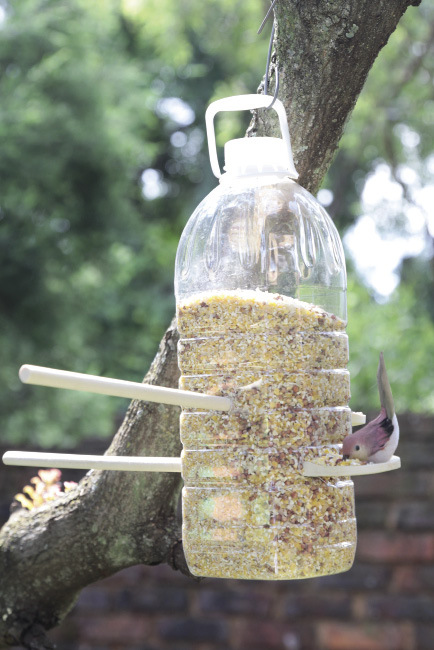
1. What is the purpose of the product? (½)
2. How does this reduce the amount of work that somebody has to do? (½)
Scenario B
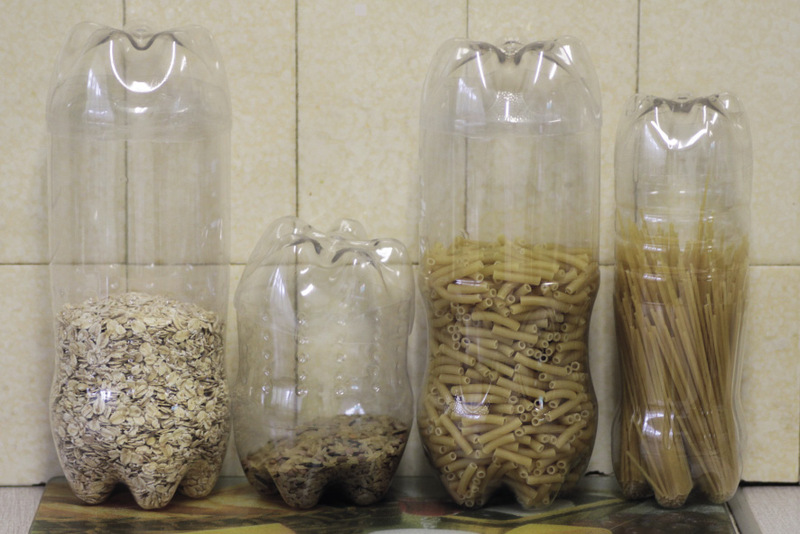
3. What is the purpose of the product? (½)
4. Can this product save you money? How? (½)
Scenario C
5. What is the purpose of the product? (½)
6. Can this product save you money or time? How? (½)
Scenario D
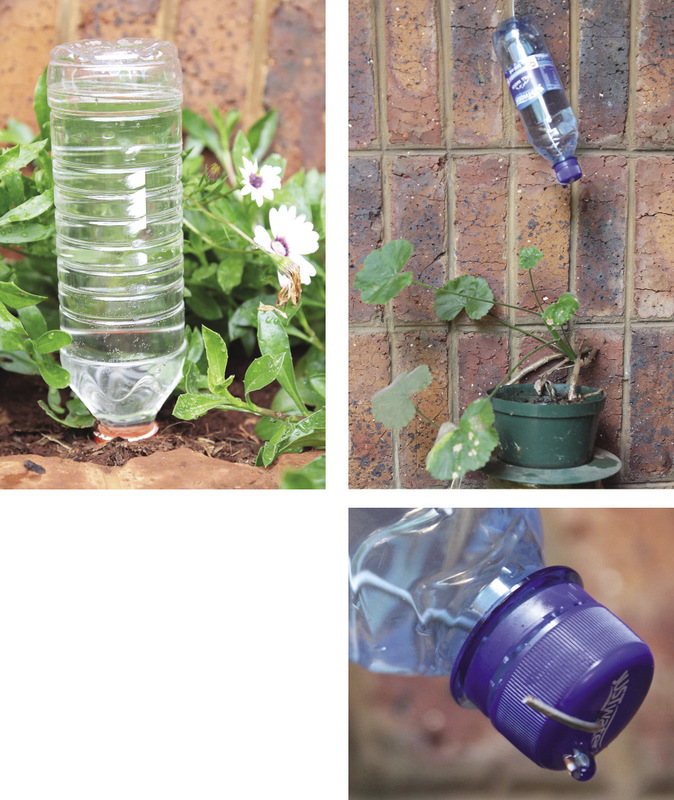
7. What is the purpose of these products? (½)
8. Can this product save you money or time? How? (½)
Total [4]
Design brief for the scenario that you chose (30 minutes)
Answer the following questions to identify the specifications and constraints for the scenario that you chose.
1. Give a description of the product you are going to make. (1)
2. Answer the following questions to identify the specifications for your design:
(a) What is the purpose of your product? (½)
(b) Should your product keep some things inside (contain it) and keep other thing out? What should it keep in and what should it keep out? (½)
(c) Should your product be supported in some way to stay upright? How? (½)
3. Answer the following questions to identify the constraints of your design:
(a) Make a list of all the materials you will need. (½)
(b) Make a list of all the tools that you will need. (½)
(c) Make a time schedule showing how much time you have to design and make the product. (½)
Total [4]
Week 2
Initial rough design sketches (30 minutes)
Make rough sketches of your design ideas for the product that you want to make. You can make sketches for different ideas and later decide which one you are going to make.
Try to design and make a product that is slightly different from the photos of the products on the previous pages, to address the need. In other words, try to make an innovative design.
The word innovative comes from the word "new". An innovative solution to a problem is a solution that nobody else thought of before.
Show notes and labels on your sketches to help to explain your ideas.[10]

Final orthographic drawing (30 minutes)
Choose your final design from your rough sketches. Then draw your product to scale using first angle orthographic projection. Show dimensions. [15]
Practice to mark out, cut and make holes in plastic (60 minutes)
You need the following materials for this activity:
- two or more old plastic bottles that have been cleaned,
- a marker pen or "koki" pen,
- nails of different sizes to make holes in the plastic,
- a strong pair of scissors to cut the plastic,
- sandpaper, and
- sticky tape to join different plastic parts together.
First make sure that the plastic bottles are clean and that all the labels and glue have been removed.
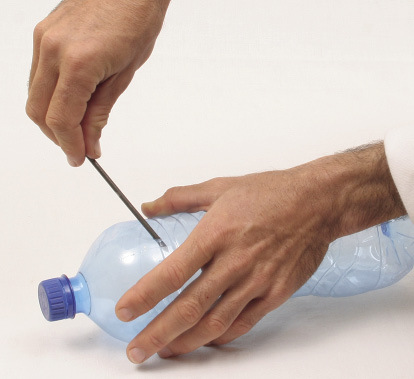
This is how to cut a plastic bottle:
First make a small hole with a thin nail where you want to start cutting. Hint: It will be easier to make the hole if you keep the cap of the bottle on and tightly secured, because then the bottle will not collapse as you press the nail in.
Then make the hole bigger by moving a thick nail around in the hole to make it bigger, as shown in the photo below. You can also use a cutting knife to make a short cut where you can then put the blade of the scissors in.
Safety warnings
A pair of scissors should not be used like a knife. If you do that, it can slip and you can cut yourself.
Do not try to cut the thick, hard parts of the bottle. If you do that, the scissors can slip and you can cut yourself.
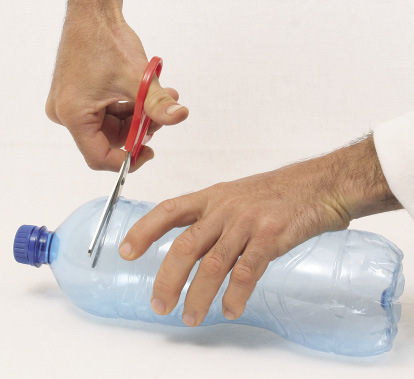
Once the hole is big enough to insert one blade of the pair of scissors, start cutting with the scissors, as shown the photo on the right.
Use sandpaper to make the sharp edges of the hole in the bottle smooth so that it can't cut you.
Week 3
Make the product you designed (90 minutes)
You can make more sketches if you realise that you need to change some things about your design. [25]
What have you learnt during this term? (30 minutes)
1. What metal is used on the surface of a sheet of corrugated iron to protect it from corrosion? (1)
2. Give some examples of steel products that have been galvanised. (1)
3. Painting and galvanising are both methods to stop steel from corroding; each method coats the steel with another substance. Complete the following sentence: The difference between the two methods is that ... (4)
4. How would you protect a steel bridge from rusting? Which of the three processes that you have learnt about in this unit do you think would be most appropriate for this task and why? (2)
5. Give two examples of food that is preserved by the process of drying. (1)
6. Why do manufacturers print a symbol like this on the bottom of plastic products? (1)
7. Why do designers prefer to use plastics instead of steel for certain parts of cars? Give four reasons. (2)
Total [12]
Make a record of the term's work
Go through all your work of this term, and make sure that the following is in your workbook so that your teacher can evaluate it.
You should have the following things in the file, ready to show your teacher. You should be able to show your teacher the place in this workbook where you have:
- answers to the questions about painting, galvanising and electroplating,
- your notes about what you observed when you electroplated a metal object,
- answers to the questions about storing grain, pickling food and drying food to preserve it,
- your notes about how you dried some food to preserve it,
- your records of the kinds of plastic that the class collected and sorted by the codes on the containers,
- a systems diagram for recycling plastic and producing pellets for re-manufacture,
- the investigation of plastics in a car – notes you made,
- the investigation of plastics in a house – notes you made,
- a sample of the material you made from fused plastic bags,
- your sketches and notes of ideas for a product to be made from fused plastic,
- your orthographic drawing of the product, and
- the product that you designed and made by reusing old plastic bottles.


