Preserving metals
In Grades 7 and 8, you learnt how to classify metals into ferrous and non-ferrous metals. In this chapter, you will revise this skill of classifying metals.
You will learn how to preserve metals by painting, galvanising and electroplating. If we recycle materials and equipment, it will help to reduce the need for mining, which has a negative impact on the environment. You will also learn how to electroplate an object.
Ferrous refers to the presence of the element iron in a metal such as steel. This generally makes the metal more prone to react with oxygen (oxidisation).
Non-ferrous metals don't contain iron molecules, such as aluminium, copper, zinc and gold. They are generally more expensive than ferrous metals.
Painting metals
Although metals, as we usually perceive them, are generally very tough, they do break down over time. Rust is one of the most common ways that metals can deteriorate. Plants and animals die, become compost and return to the earth. When metals rust, they break down into smaller particles and also return to the earth. As you know by now, metals come from the earth originally and humans extract metals by mining.
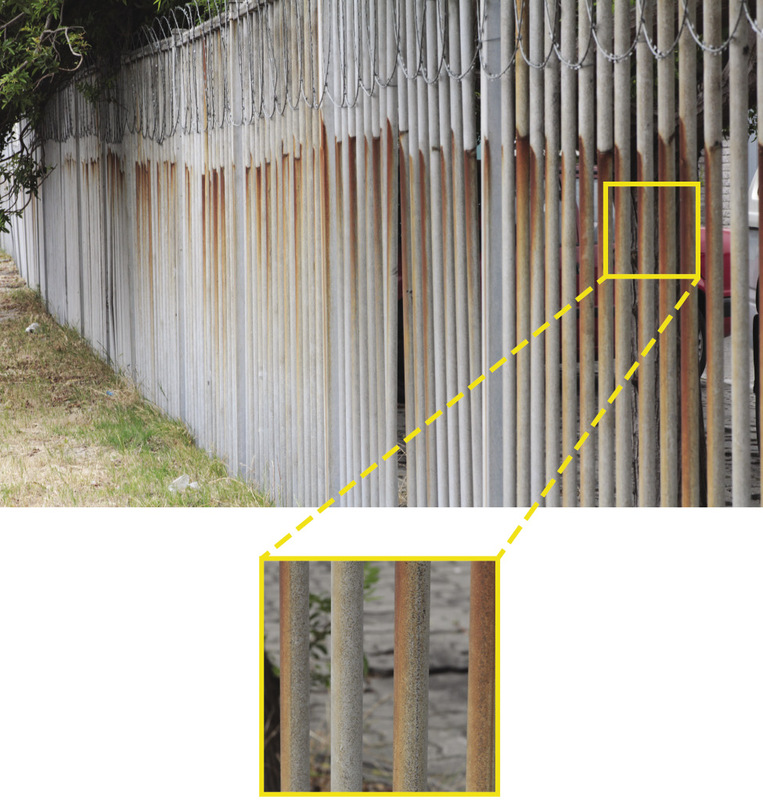
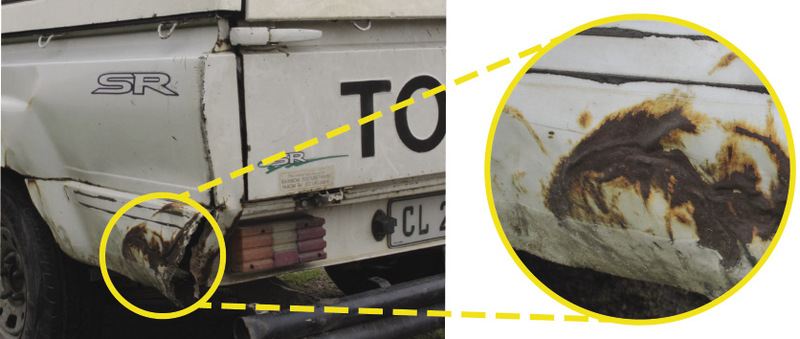
But what causes metals to rust? Sometimes a chemical reaction occurs between a metal and oxygen. This is called oxidisation, which results in rust. Another word for rust is corrosion. Ferrous metals are not resistant to corrosion. This reaction happens much faster when there is salt or certain acids in the air as well. For example, metals close to the sea tend to rust a lot quicker than metals inland. Figure 3 shows an example of this.
However, there are ways of protecting metals against oxidisation. The cheapest way of preserving ferrous metals is by painting the exposed surface.
How do you paint metal? That depends on whether it is a brand new piece of metal or a piece of metal that has already rusted.
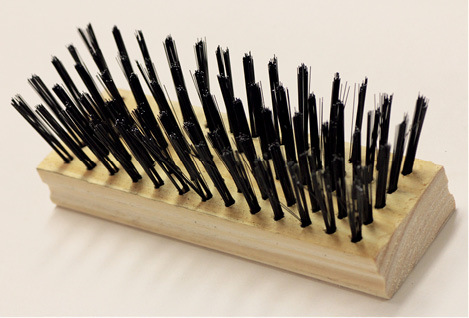
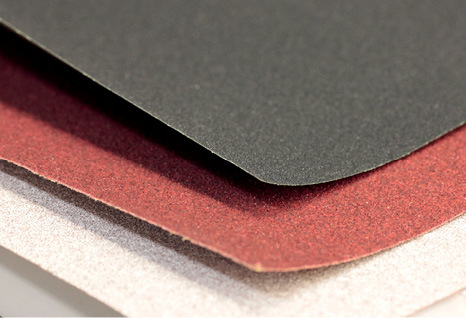
If it is a brand-new, smooth piece of metal that has never been painted before, it is best to first roughen the surface a bit. It is difficult for paint to stick to a very smooth surface. To roughen the surface, you can use wire brush such as the one shown in Figure 4 or sandpaper as shown in Figure 5. Make sure that there is no dust on the surface. You can wipe it with a clean cloth to get rid of dust. Then you must apply one, or preferably two, coats of primer. Primer protects the metal and makes it easier for the top coat of paint to stick to the metal's surface. Finally, you can apply the top coat of paint.
Painting a rusted piece of metal is a bit more difficult. First, you need to get rid of as much rust as possible. If there is old, flaky paint, you must remove that as well. A wire brush and sandpaper work well for this. It is hard to get rid of all the rust, therefore you need to apply a special primer to stop the oxidisation. If you don't use a special primer, the metal will keep rusting underneath the paint, which will make the paint come off after a while.
Important things to keep in mind when you paint:
1. Always wait till the paint you've applied is completely dry before you apply another coat.
2. Always make sure that the surface is clean before you paint it. There must be no dust or oil on it. Dust and oil prevent paint from sticking to the surface.
Certain types of primers meant to stop rusting still require another primer to be painted on top of it, before you can apply the final coat of paint.
You have to read the instructions for the specificproduct carefully before buying or using it. When you've applied all the relevant primers, you can apply your top coat of paint. Now you know how to fix rusted things and make them beautiful again, instead of just throwing them away!
Preserve metals by painting
Answer the questions below:
1. List the materials you need to use when painting metals.
2. Write a brief outline explaining why it is important to use a primer coat when painting metals.
3. In your own words, briefly explain why boats and ships have to be painted on a regular basis.
4. Study the table below. Column A describes the process of painting metals. The steps in the process are not in order. Write the number of the correct answer in Column B.
|
A |
B |
|
1. Double coat with primer. When metals are exposed to oxygen and they lose hydrogen, it results in rust or oxidisation. Primer helps the top coat of paint to stick to the surface. It also makes the metal less vulnerable to the effects of time, especially rust. |
|
|
2. Sand down your metal. Scrape or sand the surface of your metal to ensure an even longer lasting and more durable coat of paint. The rougher your metal, the more it will stick to the surface. |
|
|
3. Apply a zinc-chromate primer if you are working with rusted metal. Scrape all the loose rust and residual dust off first, then coat it with this special primer. |
|
|
4. Clean off all loose paint, dirt, grease and grime from the surface of your metal. If you miss this step, you will end up with a coat of paint that won't stick to the metal and peels off easily. Even oils on the surface that may not be visible will affect your paint job, so give your metal a thorough rub down even if you don't think it is necessary. |
|
|
5. Paint. Acrylic latex paint is usually the best paint to use for metal. A cheap metal paint or a spray paint will probably rub off. This will result in the metal requiring a new coat of paint a lot sooner. Work carefully and apply your paint evenly on the surface. |
|
|
6. Read the labels. Make sure your primer and your coat of paint are compatible. If they are not, your paint will not stick to the primer. Check the drying time to ensure that you don't put more primer on than you can paint the next day. Planning ahead is always important when painting. |
Galvanising
Apart from painting, we can also protect ferrous metals from corrosion by applying a thin coat of zinc. This process is called galvanisation.
Zinc also oxidises or rusts, but then the zinc rust reacts with the oxygen, water and carbon dioxide in the air and turns into “zinc carbonate”.
Zinc carbonate is quite tough and consequently it protects the metal underneath it. If the zinc carbonate layer gets damaged, more zinc carbonate forms. This can repeat until there is no zinc left on the metal. Then the metal will start to rust.
This means that galvanisation only slows down the corrosion of a metal. It doesn’t prevent corrosion completely. If you need to protect metal properly for a very long time, it is best to galvanise and paint the metal, which is what people do with cars today.
The word galvanisation comes from Luigi Galvani’s name. He was an Italian doctor and scientist who did experiments with electric currents in the eighteenth century.
There are two ways of galvanising metal. The one process is called "hot-dip galvanisation". The other process is called "electro-galvanisation".
Hot-dip galvanisation means that the ferrous metal gets dipped into a bath of molten zinc at a temperature of 460°. Water boils more or less at 100°, so you can imagine how hot that zinc is! Obviously, you need to do this with the right equipment and safety measures.
Molten: a metal or rock that is in liquid form as a result of great heat.
Hot-dip galvanisation has two definite advantages: it is relatively inexpensive and it is also very tough, because the zinc layer resulting from this process is thick. This makes it suitable for outdoor use, even over extended periods of time, such as 20 to 50 years. But there are drawbacks too. Firstly, the metal needs to go through a complex preparation process before it can be dipped into the molten zinc. Figure 7 shows these processes. It also makes the metal look dull and the zinc coating is not the same thickness throughout.
Electro-galvanisation means that the ferrous metal gets coated with zinc through a process called electroplating. You will learn more about electroplating in the next part of this chapter. For now, you only need to know that the zinc layer through electro-galvanisation is thinner than the hot-dip zinc layer and not as tough, but it is the same thickness throughout. The zinc coating is also generally shinier and even small objects can easily be electro-galvanised. This means that electro-galvanised metals are more commonly used indoors. For outdoor use, it will definitely have to be painted to make it last longer.
What have you learnt?
Galvanising is a process that prevents corrosion. When galvanising metal, the objects are coated with zinc. This is relatively inexpensive and does not react with air and moisture, as iron does. The zinc layer separates the iron from the oxygen and moisture. Objects that have been galvanised are not completely protected from rust. They only take longer to rust. To protect a metal completely, it is best to galvanise and paint it.
Answer the questions below:
1. Briefly discuss the function and purpose of galvanising.
2. What metal is used to coat an object when galvanising it?
3. What are the benefits of hot-dip galvanisation?
4. What are the drawbacks of hot-dip galvanisation?
5. Name two examples of galvanised products.
Electroplating

Electroplating is a process whereby one metal is coated with a thin layer of another metal by using electricity and salty water (or an electrolyte).
People do electroplating for a number of reasons. One reason could be to protect the metal from corrosion, such as galvanisation. Another reason could be to make an inexpensive metal look better.
For example, copper or silver jewellery is often gold plated to make it look more expensive.
An electrolyte is a mixture of salt and water that has the ability to conduct electricity.
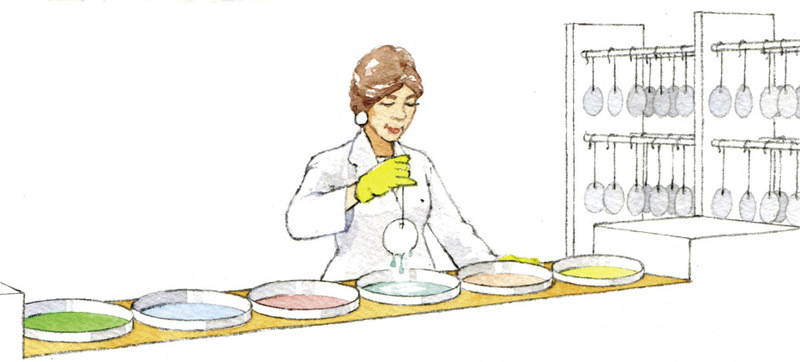
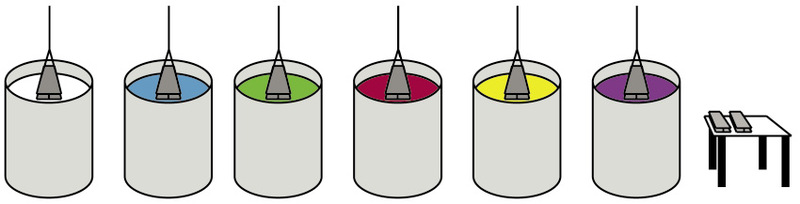
Look at Figure 8 and 9. In practice, electroplating works like this:
The object that you want coated gets connected to the negative side of an electric cell with a wire. The metal that you want to coat the object with gets connected to the positive side of the cell with a wire. Put the object and the metal, with the wires attached, into a container with the water and salt mixture.
What happens next is that electricity and metal molecules travel from the positive side to the negative side. This means that after a while, a thin layer of metal starts to form on the object. The longer you let this process continue, the thicker the metal layer will be.
Table salt is one example of a salt. Not all salts are edible, but all salts contain a metal as one of their elements. For example, table salt consists of sodium, which is a metal, and chlorine. You can't use table salt for electroplating.
Copper sulphate is also a salt. It contains copper, which is a metal, and sulphur. However, copper sulphate is VERY POISONOUS. You can use it for electroplating, but definitely not for food.

Work in a group to investigate corrosion
In this experiment, you will observe the effect of salt and water on galvanised and ungalvanised steel. Once you have everything together, it will only take a few minutes to prepare this experiment. But then you have to put your experiment in a safe place where you can observe it for a week or more.
You need the following things for this activity:
- a plastic or glass container that is not made of metal,
- enough water to fill this container,
- a packet of table salt,
- two galvanised metal items, such as a galvanisednail, a tin can or a piece of corrugated iron(hint: look at your last answer on page 102), and
- something rough or sharp that you can use to scratch off the galvanised layer from one of the items, such as a nail or sandpaper or another piece of metal.
Tin cans are made by electroplating tin onto steel.
How to do this experiment:
- Heat the water and dissolve the packet of table salt in the water.
- When it has cooled down, pour the water and salt solution into the glass or plastic container.
- Take your two galvanised metal items and put one directly into the water and salt solution.
- Use the rough or sharp object to scratch off the galvanised layer from the other galvanised object.
- Put the second object into the water as well.
- Keep both items in the water and salt solution for at least a week.
- Take them both out every day to see what has happened.
Answer the questions below:
1. Which item starts to corrode or rust first?
2. How long does it take for the metal to start corroding?
3. Is there a difference in the level of corrosion by the end of the week compared to the beginning of the week?
4. Why doesn't the other piece of metal corrode?
What have you learnt?
You have learnt three methods of protecting ferrous metals against corrosion: painting, galvanisation and electroplating. Protecting metals against corrosion makes the metals last longer, which could reduce the need for mining. You can also easily reuse a rusted piece of metal if you clean the rust off and paint it.
Reducing, reusing and recycling materials will have a positive impact on the environment.
Next week
In the next chapter, you will learn more about processing materials by extending the lifespan of food.


