Making new things out of old things
In the following two weeks, you will learn how paper is recycled. You will also learn how to make new objects out of old pieces of cardboard. You will make your own packaging for a product.
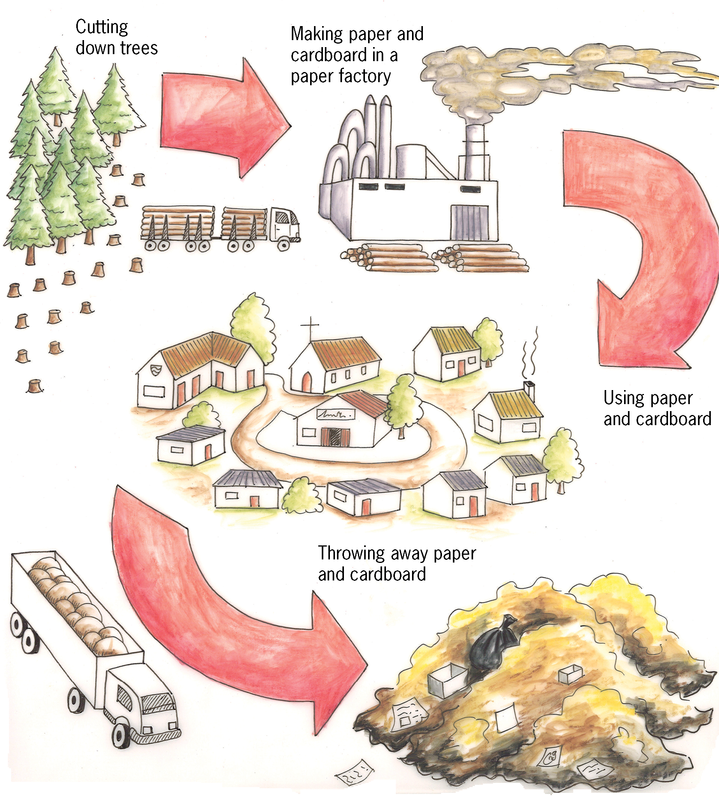
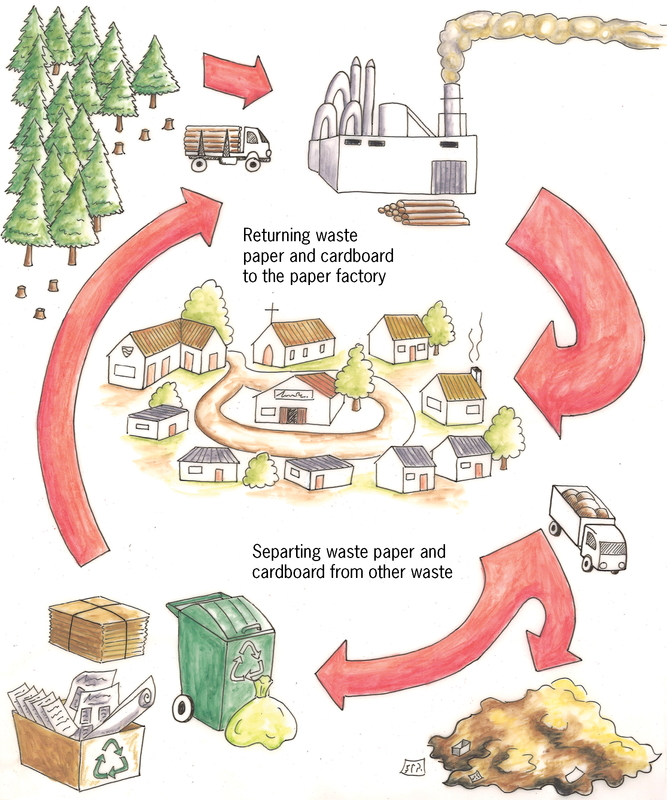
Paper and cardboard are materials that are biodegradable. They do not damage the environment when they are thrown away. They can also be burnt in order to generate heat or electricity, and no poisonous gases will be given off. But to make paper and cardboard, trees have to be cut off. If paper and cardboard are recycled, fewer trees have to be cut down.
Did you know?
When 54 kg of newspaper is recycled, one less tree has to be cut down.
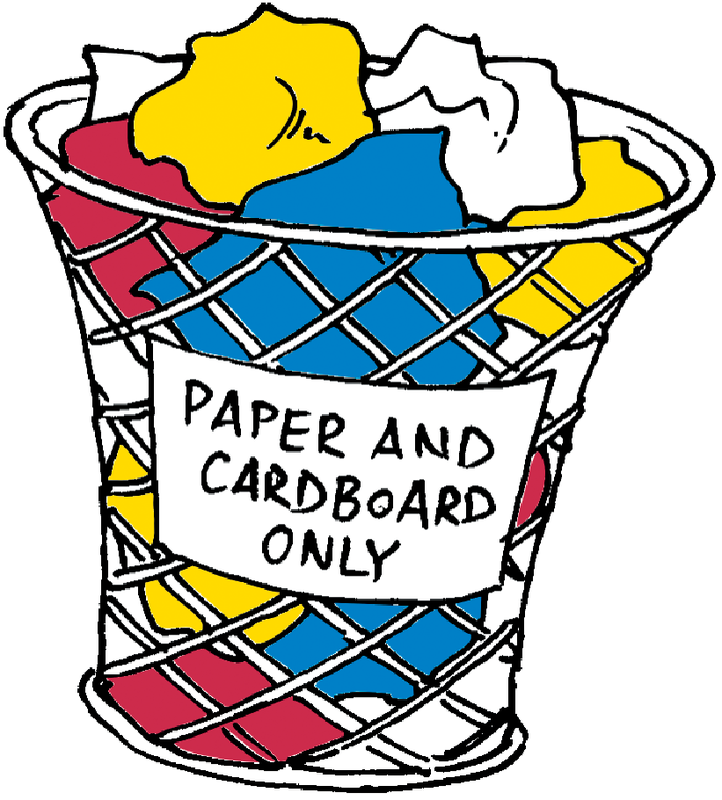
Almost 40% of municipal solid waste is paper and cardboard.
Did you know?
The average person uses almost 50 kg of paper and cardboard per year.
Poisonous chlorine gas is used to bleach paper. To bleach means to make white. The chlorine can form poisonous gases called dioxins, which can be released into the atmosphere.
What are paper and cardboard made of?
A paper recycling factory makes new paper or cardboard out of waste paper. The way this is done is explained below. You can also make recycled paper at home.
-
Waste paper is mixed with warm water and chemicals. It is stirred and chopped up by a machine to separate the thin little fibres the paper is made of. The machine that stirs and chops up the mixture of paper and water, works like a food blender.
The mixture of chopped-up paper and water is called paper pulp.
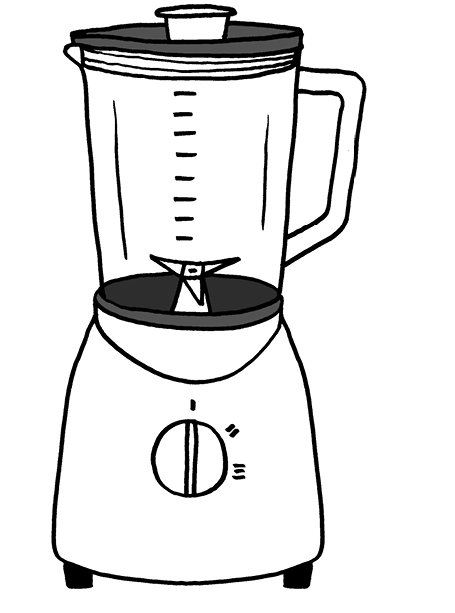
Figure 4 -
The pulp is poured through a sieve. Old glue and fibres that are very short pass through the sieve. Long, strong fibres remain on top. These fibres then go to a stirred tank where chemicals are added to remove ink from the pulp.
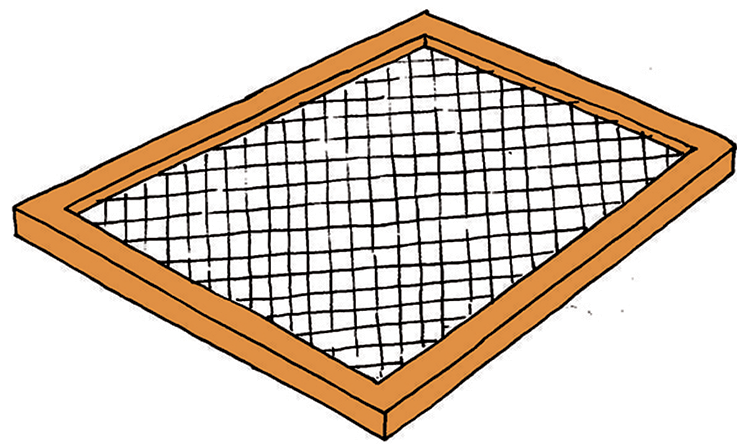
Figure 5: A sieve -
New glue is added to the pulp. Some clay is also added if the recycled paper will be used for writing or printing, because the clay gives the paper a smoother surface.
-
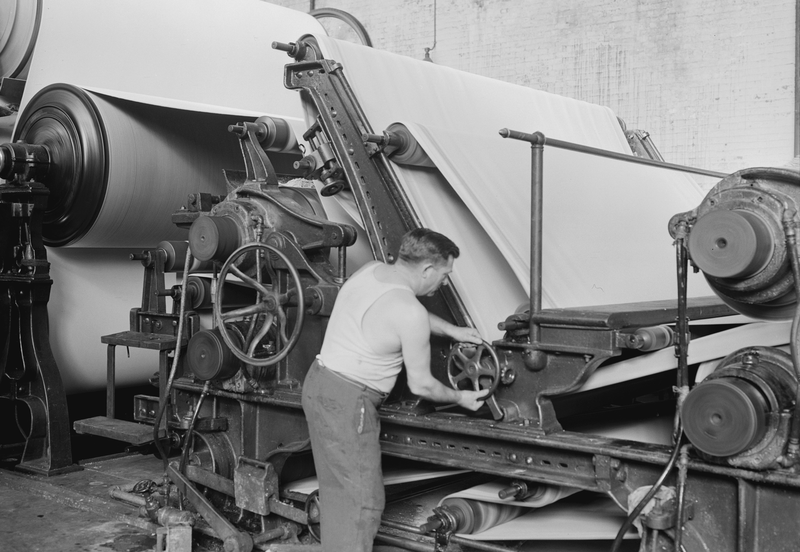
The pulp goes to a paper-making machine, where it is pressed between two rollers to give it the required thickness, and to squeeze out water.
Instead of waiting a long time for the paper to dry, it is dried more quickly by heating it and blowing hot air over it. Once the paper is dry, it is cut into the necessary size and packaged.
Paper fibres can be recycled as many as seven times. But each time it is recycled, the fibres get broken into shorter and shorter fibres. If it is recycled too many times, the fibres become too short and weak to use for making paper again.
Case study: paper recycling
-
What is cardboard made of?
-
Why can paper not be recycled more than seven times?
-
What will happen when the holes of the sieve are too big?
-
What will happen when the holes of the sieve are too small?
Homework for the next lesson
Find some old empty pill boxes and bring them to school for the next lesson. If you cannot find a pill box, bring another small box that can close after you opened it. Try to find at least two such boxes. Some spices are packaged in boxes like these, as well as some light bulbs.
Safety warning
Do not remove pills from pill boxes. Pill boxes have labels that say what the pills are and how to use them. If those labels are lost, somebody may not know what medicine to take and how to take it.
Ask your parent or another adult for an empty pill box.
How are paper and cardboard recycled?
Take out one of the small boxes that you brought to school. Look carefully at all sides of the box. Then open the box so you can look inside it, but do not tear or cut the box to open it. While you are looking at the box, try to imagine how this box was made out of flat cardboard.
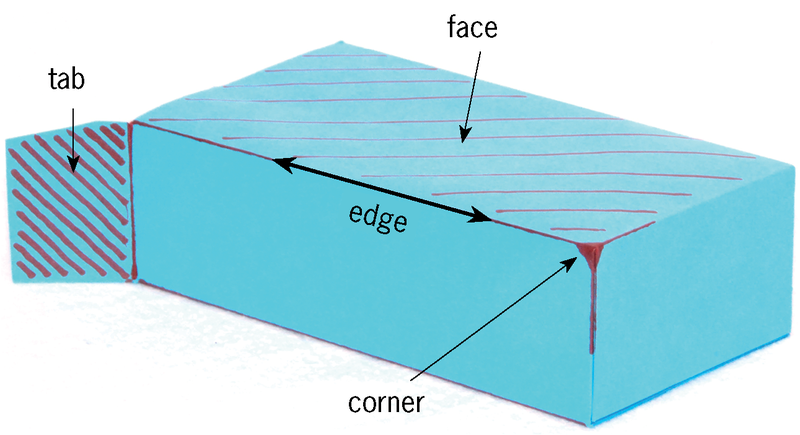
- A face is one of the flat surfaces of the box that can be seen from the outside.
- An edge is the line where two faces meet.
- A corner is where three faces meet at a single point. At this point, there are also three edges that are meeting.
- A tab is an extra flap attached to a face that helps to keep the box closed. It cannot be seen from the outside of a closed box.
Think about the different parts of a box
-
How many faces does the box have?
-
How many edges does the box have?
-
How many corners does the box have?
-
Look at the two drawings of the box below. The drawings were made by looking at the box from different angles. A name is written on each face of this box. Write the same names on the different faces of your own box.
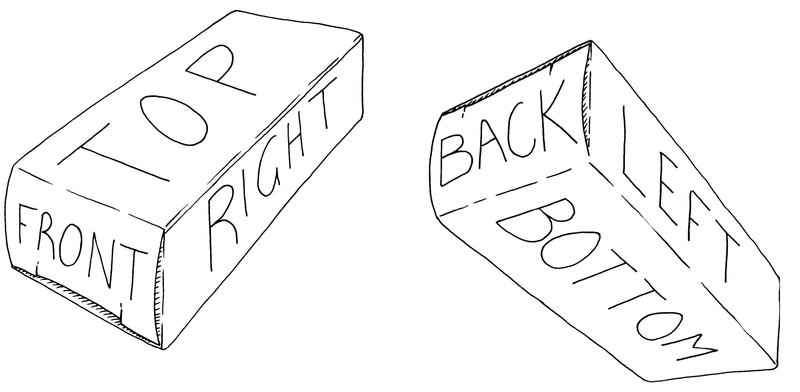
Figure 8: Giving names for the different faces of a box -
Out of how many separate pieces of cardboard was the box made?
There are three different ways in which an edge can be made in a cardboard box.
- Unbroken edge: The cardboard is simply folded along a line.
- Edge made using a tab: One of the two faces that come together has a tab attached to it. This tab folds in underneath the other face to close the box.
- Edge made with a tab glued to another face: This is the same as an edge made with a tab, but this time the tab is permanently attached to the other face by glue.
The different types of edges of your box
-
The photos below show different edges of a box.Write what kind of edge is on each photo. Write the type below the photo.
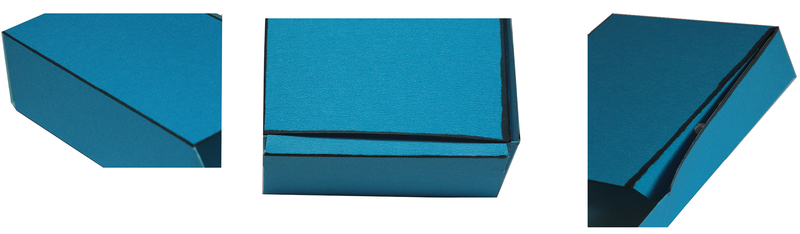
Figure 9 -
How many of the edges of your box are unbroken edges?
-
How many of the edges of your box are made using tabs that are not glued?
-
How many of the edges of your box are made using tabs that are glued?
-
How many tabs in total were used to make the box?
Homework
-
Find an old cardboard box. It should be made of thin, solid cardboard. Cereal boxes and other boxes in which food are packaged are normally made from cardboard like this. The box must not be made of corrugated cardboard.
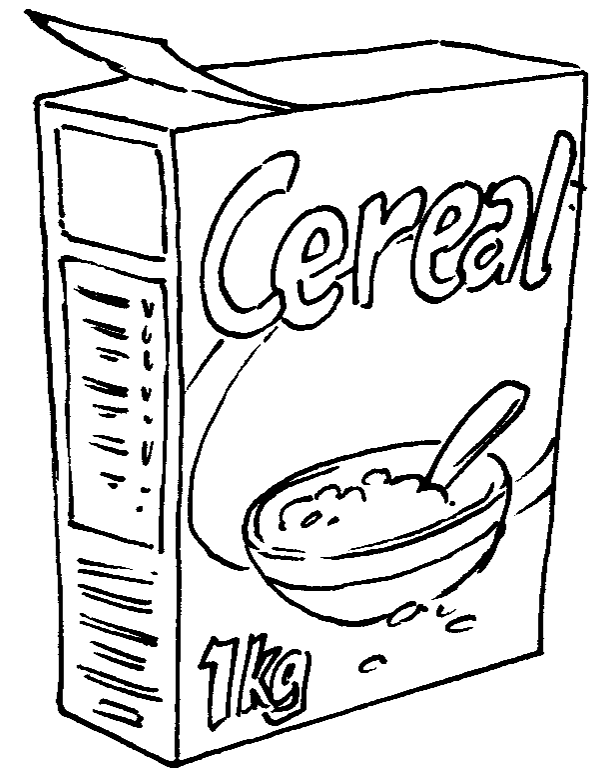
Figure 10: Boxes for packing food are made of thin, solid cardboard. -
Cut the box and fold it flat. The flat sheet of cardboard in front of you should be at least as big as an A4 sheet of paper.
-
Do the same to make two more cardboardsheets.
-
-
Find at least eight old A4 paper sheets. One side of each of these sheets should be clean, because you will draw on it.
-
Bring the paper and cardboard sheets to all your Technology lessons next week. You will reuse this old paper and cardboard to make paper and cardboard boxes.
-
Bring your pill boxes, or other small boxes, to your next lesson again.
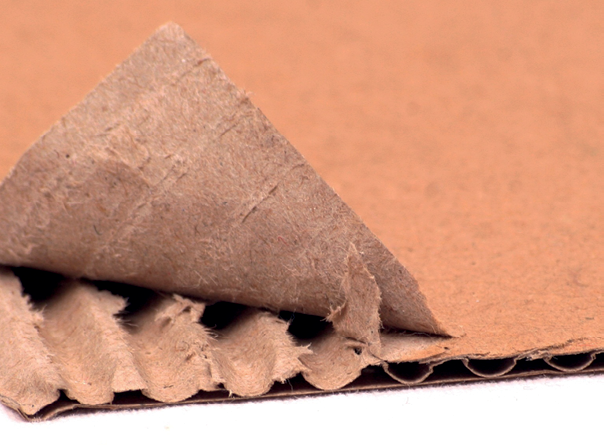
Figure 11: Large boxes are made of corrugated cardboard
Draw the development of a box
Cut the box open along the edge where it was glued together. Fold it flat. We call this the flat plan or development of the box.

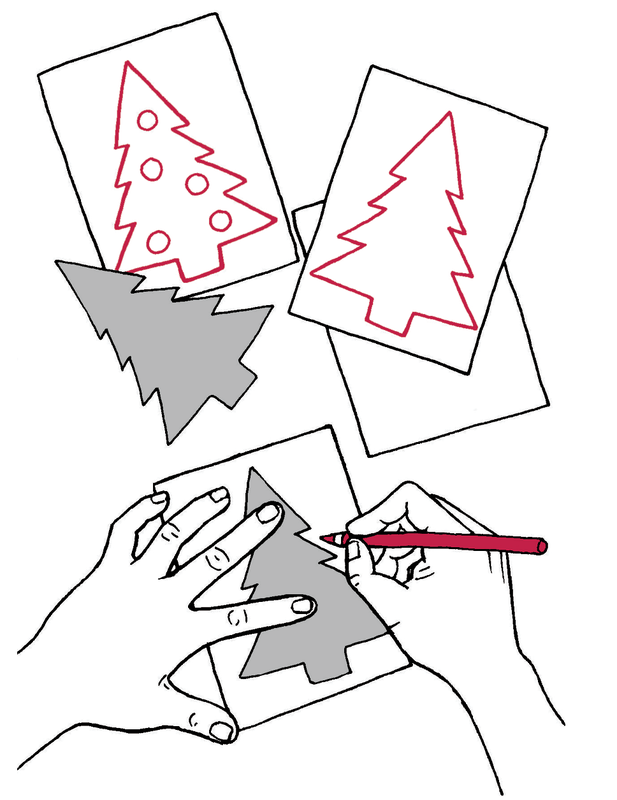
Trace the development onto a piece a paper, using a feint line. Trace it in the middle of the blank piece of paper, so that there is space left around the traced development.You can use the development many times to trace, like the illustration below shows.
When you traced the development of the box, your lines were not very neat and straight. That is why you made the lines feint. Now use a ruler to draw straight dark lines over the feint lines of your development. The dark lines has to show where the paper has to be cut. Do not draw dark lines for any other reason, otherwise you may later cut off something that you don't want to cut off!
Add dashed lines to show where the paper will be folded.
Now cut out your development. Do not cut the dashed lines that are for the folds. Fold the development to make it into a box.
If you accidentally cut off something that you should not have cut off, don't worry. Most people make mistakes when they try to design and make a box for the first time. But learn from your mistakes. Ask yourself what you should do next time to make the box right, or better.
Homework
-
Make a new paper model of your box. This time make a neater one. Think carefully before you start cutting out your development, to make sure that you do not cut off something that should not be cut off.
Remember that your paper model of the box should be made out of just one piece of paper.
-
Bring the cardboard box that you cut open and folded flat, as well as the paper model you made of this box, to the next lesson.
Remember to bring the paper and cardboard sheets that you gathered over the weekend to each lesson next week.
-
Make your own box
Learning the tricks
Now that you have successfully made a paper box,you will prepare for making a stronger box out ofcardboard, using the same design.
You will make a cardboard box this week, but you first have to learn a few tricks. People who do technological work call tricks like these techniques. It makes sense that the word technology is similar to the word technique!
Cardboard is more difficult to fold. And thick cardboard can crack when you fold it. You first need to learn a trick for folding cardboard. You also need to learn how to join two pieces of cardboard together with glue. You will have to do it in such a way that the glue will dry quickly, and the joint will be strong.
How to glue cardboard
You will join two pieces of cardboard with white wood glue. But first do an experiment to find out whether it is better to use a lot of glue, or only a little bit of glue.
Join two small pieces of cardboard with a thick layer of glue between them. Press the pieces of cardboard together for two minutes, then let go. Has the glue dried? Try to gently pull the two pieces of cardboard apart. Is the joint strong?
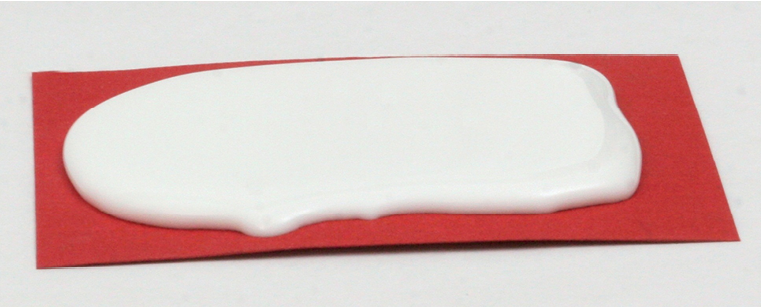
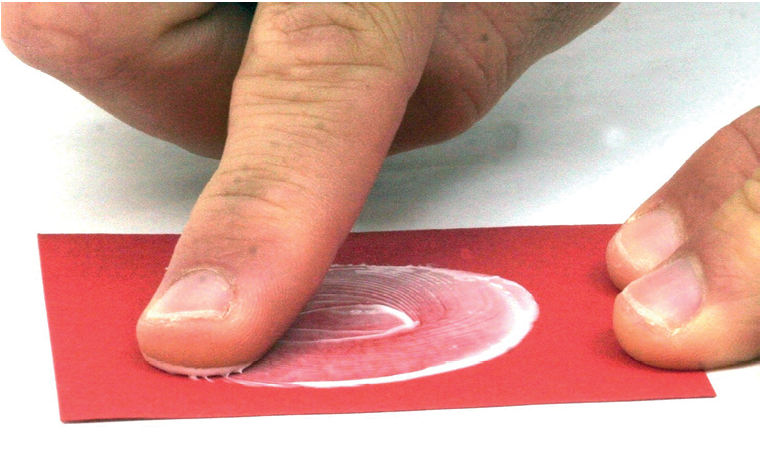
Now try to join two other pieces of cardboard. This time use very little glue. Put only a drop of glue on the cardboard, and then spread it with your finger. Wood glue is not poisonous, and you can wash it off with water. The cardboard should look wet and shiny. It should not look white like the glue. Press the pieces of cardboard together for two minutes, then let go. Has the glue dried? Try to gently pull the two pieces of cardboard apart. Is the joint strong?
How to fold cardboard
To fold cardboard to make a 90° bend, you first need to do the following experiment to find out what the best technique is.
Fold a rectangular piece of cardboard in half. Use a thick piece of cardboard, like the cardboard that a cereal box is made of. The length of the fold should be at least 10 cm. Cut three pieces of cardboard that you will fold in half in different ways.
With the first piece of cardboard, draw a pencil line on the inside and then fold along that line. Fold it all the way over, using the end of your pencil to make the fold sharp. Then bend it back so that it forms a 90° bend.

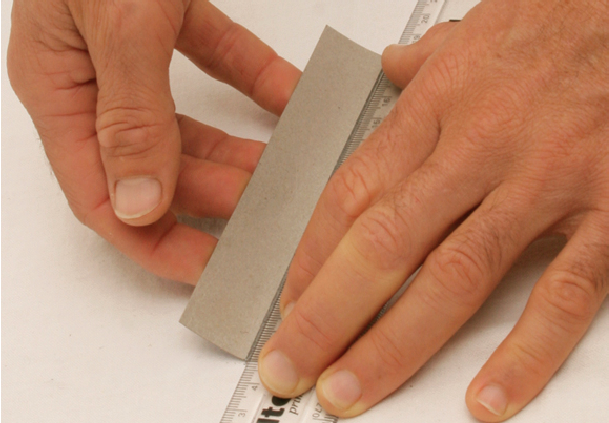
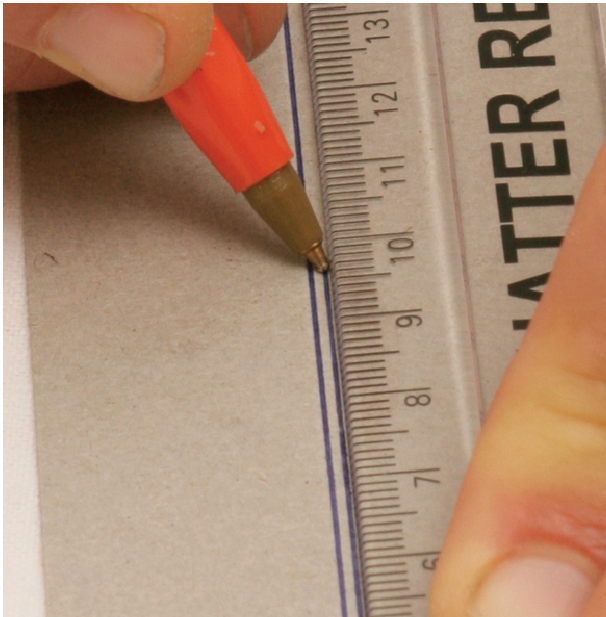
To fold the second piece of cardboard, first make a groove on the outside of the cardboard. Put your ruler where you want the fold to be, then draw a line with a ball point pen. Press hard with the pen, to make a groove in the cardboard. Grip the ruler tightly so that it does not move while you draw the line. Draw the same line two or three times, to make the groove deeper. Fold the cardboard along this groove. Fold it all the way over, using the end of your pencil to make the fold sharp. Then bend it back so that it forms a 90° bend.
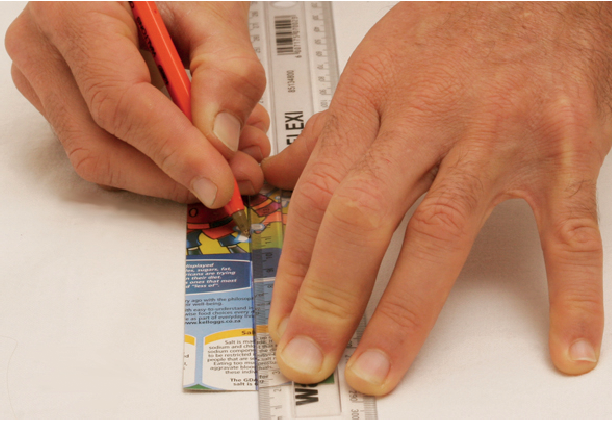
To fold the third piece of cardboard, first make two grooves on the inside of the cardboard. Make a groove in the same way as before. The two grooves should be parallel, and 1 mm to 2 mm apart. Fold the cardboard along these grooves. Fold it all the way over, using the end of your pencil to make the fold sharp. Then bend it back so that it forms a 90° bend.
Now look closely at each of the three folds. Is it a neat fold? Are there any cracks on the outside of the fold? Was it easy or difficult to make the fold? Is the fold exactly where you wanted it to be?
Which way of folding do you think is the best?
Your final box
Use the cardboard box that you folded flat to trace the same design onto a flat sheet of cardboard. (See Figure 12) Use feint lines. Once again draw the glued tab in the position where it was originally attached to the single piece of cardboard.
Do the same as you did to make your paper model of the box. But this time, use the best technique to make a fold in the cardboard.
When you have cut and folded the cardboard, first test whether it will make a box, and that all the tabs are there. If it is correct, then glue the one tab to the face to which it should be glued. Use the right amount of glue.
If you have time left in the lesson, also do the following activity.
Something extra you could do to make your boxclose better
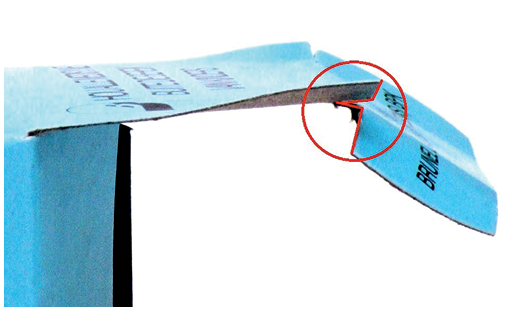
Look closely at the tabs of a pill box. You will see small cuts in some of the tabs. What do you think is the purpose of those small cuts?
Make a new cardboard box, but this time also make those small cuts.
Make a pencil case
Design a new box of a different size. The new box will be used as a pencil case. You should be able to fit two pencils, two pens, an eraser and a sharpener in it. You will design the pencil case by using the same ideas that you used to make your previous cardboard box.
First make a rough plan of how the development for the box will look. Do this on the next page. The rough plan should show all the dimensions of the development. Dimensions mean the same as measurements. To draw up the rough plan as quickly as possible, make the drawing by hand, without a ruler.
Then draw the plan accurately on a piece of cardboard, using your ruler to measure and draw straight lines. Remember to use dashed lines to show where the paper will be folded. Do not cut along the dashed lines.
Go on and make your own cardboard pencil case.
Make a rough sketch of a development for a pencil case:

Reduce, reuse, recycle
Last week you learnt that it damages the environment when more and more plastic is made and thrown away. You can reduce this negative impact on the environment in different ways.
Firstly, you can buy less plastic things, which is called reducing your consumption. Secondly, you can use some things over and over, so that you donât have to buy new things. This is called reusing things.
This week you learnt about recycling. What if you have something, and that something gets broken or you donât need it anymore? Then you have to throw it away. Fortunately, there is a clever way of throwing things away, by separating the different types of waste. For example, if you and your family collect all your plastic waste separately, then someone can take that plastic to a recycling factory where new plastic is made from the old plastic.
Next week
Next week, you will learn where electricity comes from. Generating electricity has a negative impact on the environment. Burning wood or gas or paraffin for heating or cooking, also has a negative impact. You will think of ways to reduce this negative impact, by designing a house in a clever way.


