Draw what you see
In this chapter, you will learn how to make two types of drawings. Drawings help us to show others what our ideas look like. Drawings also help us to evaluate our ideas, to become aware of problems and to develop solutions.
Two types of drawings
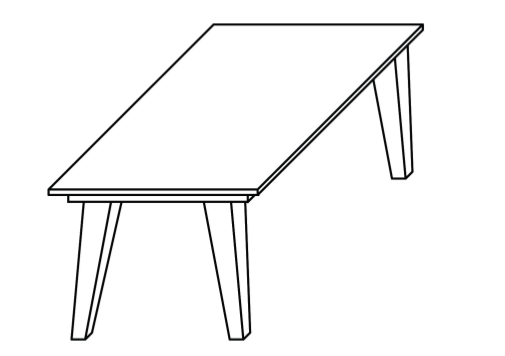
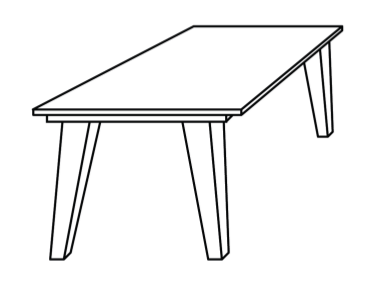
Look at drawings A and B again. Do you see drawings of two different tables, or two different drawings of the same table? Take your time and think carefully before you answer.
-
Look at drawing A and drawing B on the opposite page. Also look at drawing C and drawing D on the next page. Is drawing C or D the same as drawing A, only smaller? Explain why you say so.
-
How do drawings A and B differ?
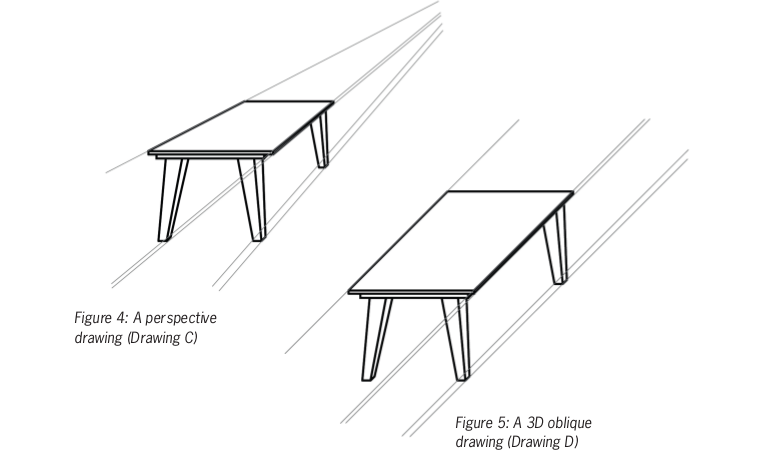
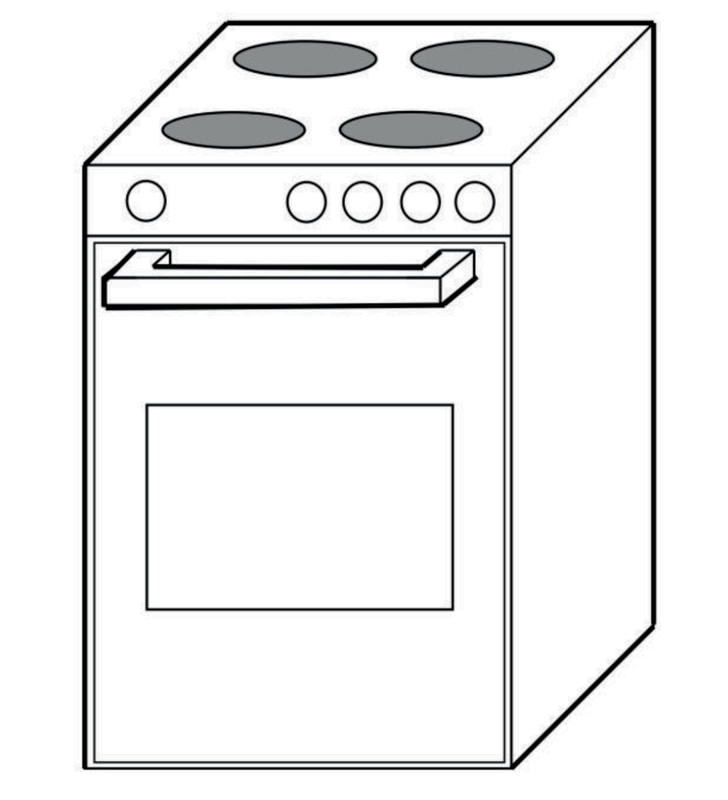
Drawings such as Figure 4 (drawing C) are called perspective drawings, or 3D artistic drawings. In a perspective drawing, the artist tries to show what she actually sees. You cannot take accurate measurements from perspective drawings.
Drawings such as Figure 5 (drawing D) are called 3D oblique drawings. They look different from what you actually see when you look at the object. Measurements can be taken from 3D oblique drawings.
In the next lesson, you will make 3D oblique drawings.
3d oblique drawing
Make a 3d oblique sketch
You can make a good 3D oblique sketch of a stove if you follow the instructions given below.
It is easier if you first draw a box that shows the shape of the stove. Do that on the next page. Do not use a ruler.
To draw a box, first draw a rectangle to show the front of the box, as shown in step 1 below. Draw the rectangle in the left lower part of the page.
Draw another rectangle of the same size as shown in step 2 below. Then draw sloping lines as in step 3 to show the edges of the box that go from the front to the back.
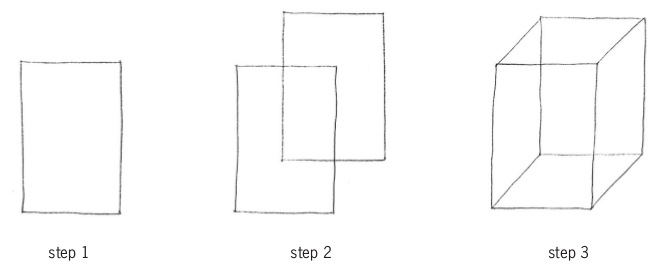
The word sketch is often used to indicate a drawing that is made without a ruler or other drawing instruments.
Instead of saying sketch, you can also say free-hand drawing.
Make your 3D oblique sketch on this page. Make it big.
Change your box into a stove
Now see if you can change your box into a stove. Here are some tips:
- The plates on top of a stove are circles. On a drawing like this, they will be squashed circles (ellipses).
- The circles for the knobs are real circles. This is because everything on the front of the drawing is the same as it is in real life.
- Look at how the handle is drawn. It comes out of the front face. To do this, use sloping lines coming forward.
- Make all lines that you can see on the objects thick.
Something to do at home
3D oblique drawings are easier to make on grid paper, like the one on the next page. Make a better drawing of the stove on the grid paper. One of the sloping lines is already drawn.
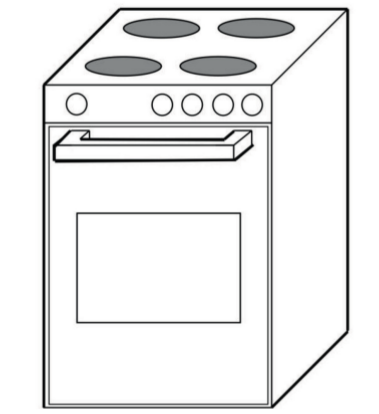
Accurate 3d oblique drawing
The drawing below is an accurate oblique drawing of the stove.
-
Write down the length, height and breadth of this stove.
-
Now measure the length, height and breadth on the drawing with a ruler.
-
What do you notice about the breadth line? Is it drawn to the same scale as the length and height lines?
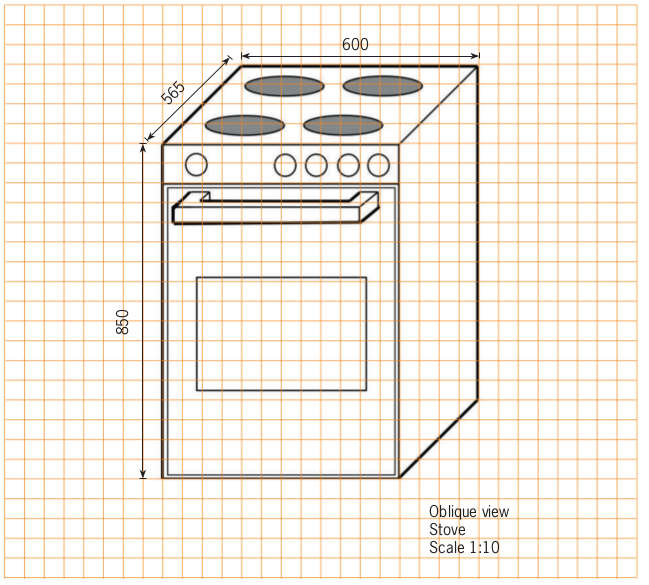
Figure 9 
A few important things about oblique drawings
For the front view of an oblique drawing, we use true scale measurements. So if the length of the object is 600 mm and the scale is 1:10, you will draw the length as 60 cm (600 mm).
But in the sloping breadth direction, you must halve the true scale measurement. So if the breadth is 565 mm and the scale is 1:10, you must draw the breadth line as 282,5 mm or 28,25 cm.
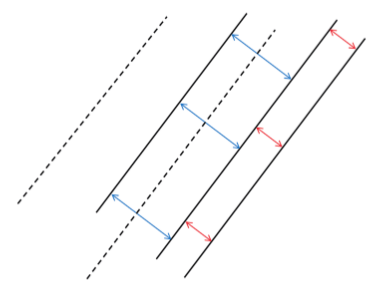
Figure 10 -
Use the grid on the previous page to make an accurate 3D oblique drawing of the stove, with scale 1:5.
In 3D oblique drawings, all lines in the breadth are parallel, as shown above.

Perspective drawing
When we see something far away, it looks small. When you are close to an object, it looks big.
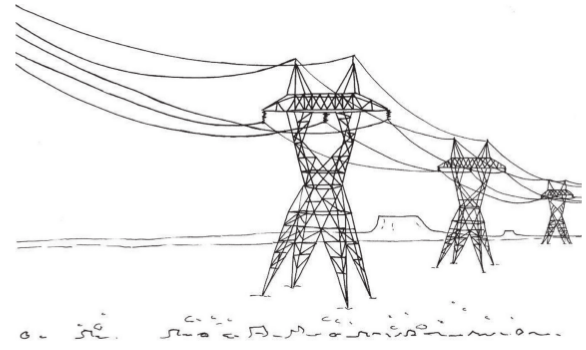
When you make a 3D drawing that shows things getting smallerin the distance, it is called a perspective drawing.
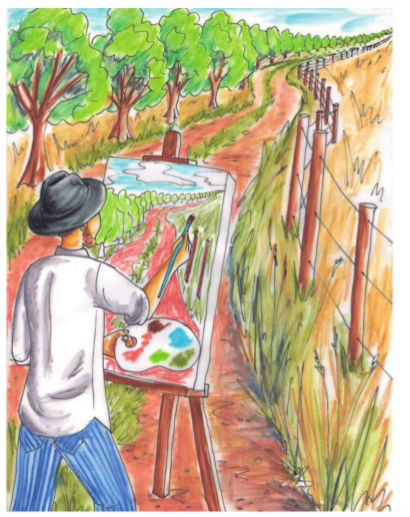
Look at this sketch of a fence. It has been drawn going back into the distance.
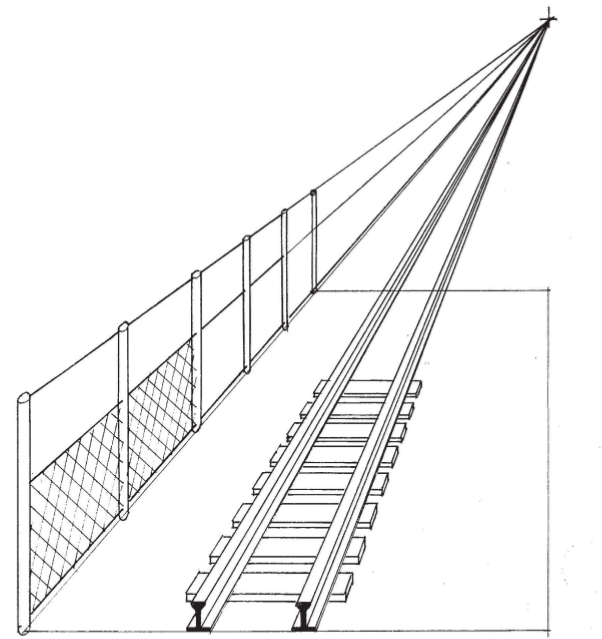
Use the steps below to draw the fence on the next page
-
From the bottom left-hand corner of your page, draw a fence post. This will be the tallest post because it is the closest to you.
-
In the top right-hand corner of the page, draw a point. This point is called the vanishing point (VP). It represents a distance so far away that you can no longer see how tall something is.
-
From the top of the front post, draw a thin guideline to the vanishing point (VP). You can use a ruler for this.
-
From the bottom of the front post, draw another thin guideline to the vanishing point.
-
Draw a second post behind the first. The bottom of this post must start at the bottom guideline and it must stop at the top guideline.
-
Carry on drawing more posts going backwards into the distance.
-
Keep in mind that the posts will look as if they are getting closer and closer together.
-
Now add some crossing lines to represent fence wire.
Draw the fence on this page.

Draw a matchbox in perspective
In the bottom left-hand corner of this page, draw a rectangle to represent the front of the matchbox. Part of the rectangle is already drawn for you.
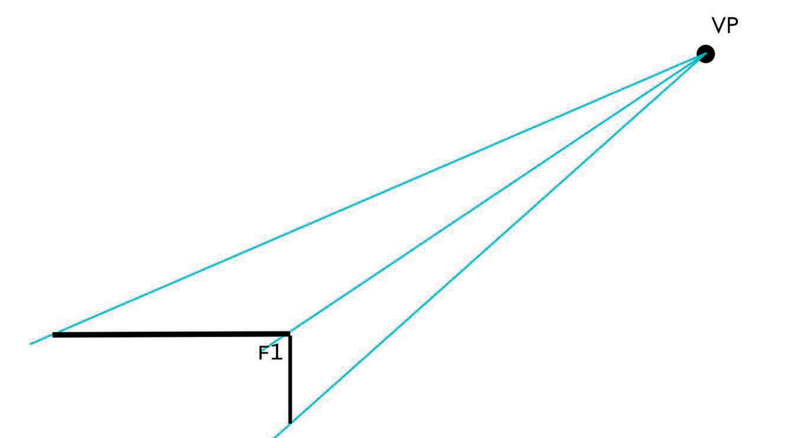
From each corner of the rectangle, draw a thin guideline to the vanishing point. You can use a ruler.
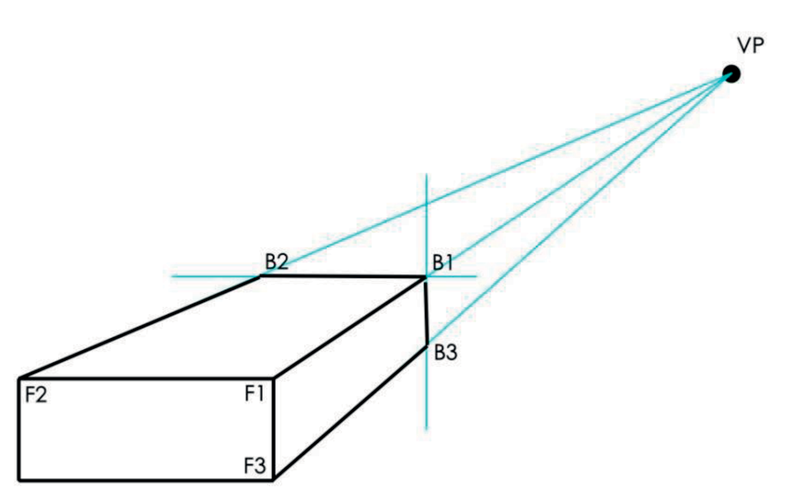
Moving back along the guideline from the vanishing point, mark off a point (B1), which makes the breadth of the matchbox look right.
From this point (B1), draw a vertical line down to the bottom guideline. This is the side edge at the back of the matchbox.
From the same point (B1), draw a horizontal line towards the left hand guideline. This will represent the top edge at the back.
Perspective drawing with texture and shading
Look at the open matchbox shown. Thick and thin lines have been used to make the edges stand out. Try to do this on the matchbox you have already drawn, or on a new drawing.
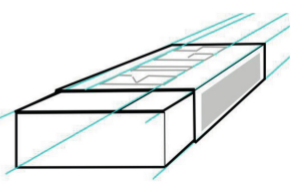
Draw an open matchbox using single vanishing point perspective in the space below.
Add more shading, and even colour
When a surface is flat, the whole surface looks as if it is the same colour. But some surfaces look darker than others, depending on where the light is coming from.
To shade a box so that it looks 3D,draw a new box in the space belowand do the following:
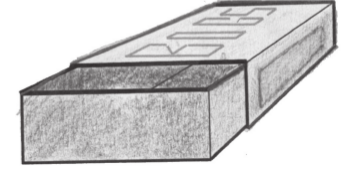
- Colour the front, top and sidesurfaces lightly in one colour. You can use a pencil or a coloured pencil.
- Choose the face that will be the second darkest. Colour this surface a second time.
- Choose the face that will be the darkest. If the light is behind the drawing, this will be the front face. Then lightly shade this surface two more times, so the darkest face will have been coloured three times.

Next week
Next week, you will learn about mechanical systems. You will explore how levers work to make it easier to move things.


